Wednesday, November 25, 2015

Robotics with Mindstorm and Creative Learning

The Lego Mindstorm Robotics System has been around for quite some time.  Legos are imaginative and creativity and in it's own inner changeable brick system of engineering it inspires and motivates learners to create and explore. No lesson plan needed organic learning. Part of the open endness of Lego's NXT and EV3 bricks is you can just put them out and let the kids go and they will learn.  For many teachers this allowing of authentic learning is difficult.  Plenty of well meaning educators take an open-ended item like Legos and use it to force a set of lessons and projects on kids. While there is value in following a curriculum sometimes forcing or structuring creativity limits the learning. Allowing for authentic learning puts the controls of the objectives in the hands of the learner. I love to set up the environment and get out the way.  If the kids need help programing or finding a part I am there for them.  Other wise I let my son go.  Sometimes he may want to try a project but usually he just does his own design. You have to see that learning happens through play and allow for the child to unfold and learning through their own process of trial and error.  With Lego the control is built into the widget you make.  If it works or if it fails to you learn. 
My son has had free range over Mindstorm for 5 years.  This year we hired a tutor who show us some programing  on NXT Lego Mindstorm brick.  While my son is very creative and able to design Lego projects his tutor has been able to teach him some basic brick programming with the Mindstorm software.  My son wanted to make a claw grabber and had a book that helped him.  Our tutor didn't want to do this but did turn it into a programing lesson.  The instructor was stuck on having my son do his created lesson and had a hard time letting go of his learning plan and allowing my son to create his own projects.  The Tutor did adapted a bit and was able to show Conor more programing on the projects that Conor found meaningful. They have used many learning concepts of programming the sensors and experimenting by adjusting the robot to react to light by picking up with a claw which has a sensor in it to grab an egg and releasing it.  The claw robot's sensor has to be adjusted to the reflected light off of the egg and react to different lighting outside in order to clamp down. This activity took time and work to get right.
Here they are learning about programming the NXT brick and controlling the sensors.
Building the claw robot and learning about taking risk and how mistakes in design teach us how to get things right.  Our tutor was not use to the autistic mind but was fairly patient and seems to enjoy this process with his learner.
To understand learning creativity takes time and playing with your design is important to the process of making.  Yes as an educator I can step in and fix a design, making the project mind in the process, but what is my fixing the mistake teaching the kid?  The goal is for the learner to be involved in the process.  A great educator knows when to step back and allow learning to happen.
The goal isn't just the Widget, it's the process of making.

Every week this tutor brought a cool project over.  My son didn't always want to do what his tutor brought over for him.  Sometimes they had fun. Here they are building a structure out of newspapers and learning what shapes support the structure and how form and balance are required in adding one more section.  This project was part of a marble run made from newspapers and tape.

Here my son is problem solving by taking apart the claw robot to fix an area that needed restructuring to work.  More learning through mistakes. This project took a few weeks.  Below is Conor's marble run,  made with box, tape and straws, brought over by the tutor. Later below more building to happen over Thanksgiving weekend with older sisters visit with partner.


Out came and old marble run toy and the marble run structure continued with more building.
The original marble run project made of boxes, tape, straws and paint chip samples.
More learning with great open ended tools in an environment and let them go.  They are their own teachers.
We all learn by playing.  My adult children all remarked on how they would have loved to have learned this way, and how their life's would have been so different if they had had this learning space and an educator who let them learn this way.  They plan to give this gift of learning style to their children.  I think as an educator that recognition means more to me than anything.  Smiles and engagement in the activity mean the joy of learning is happening in our school room.
Unfortunately these structures got thrown way when the garage got cleaned out but the possibilities of it were limitless and the project can be recreated again. Imagine, create, play, share, think, recreate and play some more.  Our never ending spiral of learning creativity.
The mineshaft climber was another project created. Often these projects are abandoned after a short while but there is value in every step of the process of learning. It all matters.
I am grateful for and thankful for our grant through the Arizona State's Empowerment Scholarship Program that makes buying these materials possible.  My son and my life will be forever altered by this grant.

Thursday, November 19, 2015

A Big Slice of Life with Autism on the Side

I don't like labels.  Silly words we use to classify and sort ourselves and others in to little neat packages to put ourselves into tidy little slots.
I am a reader and fastidious researcher.  I have stayed up researching all night long sometimes just for fun.  I like it.  I tend to dive into researching and when my son was at four years of age diagnosed with autism I was a researcher on a mission.  I went at it in a multi-layered way. I read medical journals, joined Aspies for Freedom forum, went to conferences, and read books and combed search engines for any information.  It has taken me years to gather and understand what is autism and how to think about "autism" and what that means with my son now.  He keeps growing and changing and showing me more things that are so much more than a one word label for who he is.  Many of the things I see him do few other people ever see.  You can't ever assume you know what is going between another person's ears.  No one can say I am an expert in autism and objectively say they understand autism in all it's shapes and forms.  Austism continues to blow me away with all its many facets and nuances.
 I myself had been labeled as learning disabled so I came from a first person narrative of what it is to be labeled with a negative tittle.  Dyslexia was something I knew I had but not something I really suffered from like a disease or condition.  Like being left handed it just meant I had to adjust and find an alternative ways to get from point A to point B.  I knew teachers didn't know what to do with me.  I knew I did not test well.  I knew I frustrated them and they did not think I could read and comprehend what I read.   I had a hard time showing them on paper what I knew as a child.   I also knew I could read and loved the written word and had a almost photographic memory of what I saw and heard.  I just could not remember how to spell.  I knew what the educational system thought of me was not even close to a reflection of what was going on between my ears at a very early age.  I learned early that people who are supposedly experts in education are very limited in their understand of how we learn. No one can see what is happening cognitively in another persons head and meta cognitively we are all very different. Not only are our brains different chemically but we all learn differently too.  I grew up in a time when educators didn't know much about different kinds of learners or differentiated      learning /multiple intelligence and I was just ignored and dismissed. I knew they couldn't see me and that change my perception of the experts being capable.  When my son was given a diagnosis of Autism by a developmental psychiatrist I didn't feel like that was a horrible thing.  I never thought of myself as disabled and it never occurred to me to think of my son as anything but who he was, and still is, a beautiful boy.
Through the years this philosophy of seeing my son as differently abled has taken me to some very interesting places. Sometimes I have left quickly and walked away because the table isn't ready for us or even the more hurtful we are not wanted at the table.  More and more I find we are happier and more fulfilled at our own table creating our own happy and doing our own thing.


Actress Mayim Bialik (who plays Amy Farrah-Fowler on TBBT) was being interviewed by Neil DeGrasse Tyson when he asked her about the speculation of Sheldon's label. She gave a response that Radio Times lauded as “Brilliant”. She said,
“All of our characters are in theory on the neuropsychiatric spectrum, I would say, Sheldon often gets talked about in terms of Asperger’s or OCD. He has a thing with germs, he has a thing with numbers, he’s got a lot of that precision that we see in OCD. There’s a lot of interesting features to all of our characters that make them technically unconventional socially…
I think what’s interesting and kind of sweet and what should not be lost on people is we don’t pathologise our characters. We don’t talk about medicating them or even really changing them.
And I think that’s what’s interesting for those of us who are unconventional people or who know and love people who are on any sort of spectrum, we often find ways to work around that. It doesn’t always need to be solved and medicated and labelled.
And what we’re trying to show with our show is that this is a group of people who likely were teased, mocked, told that they will never be appreciated or loved, and we have a group of people who have successful careers, active social lives (that involve things like Dungeons and Dragons and video games), but they also have relationships, and that’s a fulfilling and satisfying life.”


It is one thing to see yourself as whole and well.  It's is harder to get the world to treat you as being whole and well. Life isn't a carefully constructed TV show  with a safe set and actors who are not on the spectrum  acting like they are.  I love the perspective. Life, camera, action in the neuro typical world isn't choreographed for such a seamless existence.   Label or no label I and my son are different.  Our learning styles, our sensitivity and our perspective makes us different not broken.  Part of the journey for any human is survival, pursuing happiness and self improvement.  So basic needs and desires are the same for us as they are for anyone.  While my son learns to live with his shape and shade of personhood and adjust to life in all it's rapidly changing incarnations he will have to come to his own terms and identity as to what his life with autism on side will look like for him. It is my job to support, encourage and hand him more paints and brush if he looses his way. He gets to paint the picture and it can and will be anything he chooses to create.

Monday, November 16, 2015

How to Have Fun and Learn- Christmas Break Extended Learning Projects.


My biggest job as an educator and parent is to create and model the joy of learning to my students.  One of my most  favorite courses that I took at the university level was Massachusetts Institute of Technology's “Learning Creative Learning” class.  This was a free online course at MIT”S Open Courseware.  Here’s that link for anyone interested in taking the course. HERE

What really made an impression on me about learning creative learning was that learning is playing and having fun.  Professor Mitch Resnick, one of the courses creators used a model of a Life Long Sandbox of learning and spoke of that when we open the walls of our classroom and raise the ceiling to allow more learners in we create a space for the joy of creative learning. This is part of MIT’s Lifelong Kindergarten idea that changed the way I thought about learning.  This course shows a diagram of how we learn creativity but this model works for more than just creative learning.  It carries over to all subjects that are project based or group lead.  It goes well with the Bloom’s Taxonomy described HERE

In a nut shell.

We learn in these steps.

Imagine:  We think of an idea, we conceptualizes, we imagine an idea.
Create:    We make the idea, we draw, we build, we make.
Play:        We use the idea or the object we make and we experiment how it works.
Share:      We show it to the group, peers or our family, we get feed back, we let others help create.
    
    Sometimes our project doesn’t work and/or it gets knocked down which leads us to the next step.

Reflect:     We think about what went wrong and what worked and what we can do better
Imagine:    We recreate fix and make our ideas better.
 
This model of how we learn is flow chart that continues in a circle or spiral.  While you work on the activities below refer back to the Imagine-Create-Play-Share-Reflect-Imagine model.   Remember playing is essential to learning and allow yourself to do something you might not have ever thought of as learning.


The least thing I liked about Christmas break as a child was the packet of worksheets my well meaning teachers sent home for me to do over the break.  No matter how they package them or wrapped them they were still worksheets and frankly boring.
Learning should be joyful, if we are to create life long learners we need to find activities that make the majority of learners want to participate. so here are a few activities to try this break.  Have fun and never be afraid to mess up.  This is how we learn.  Keep at it, don't quit and don't worry if it is silly or not perfect.  This is how learning looks.


MATH PATTERNS:  Decorate a Christmas tree on paper or the real thing using patterning and show your work.  Use ornaments, strings of popcorn or garland or pine cones and follow a pattern of color or shapes or texture.  Ask someone to see if they can see it and get your family to help.

MATH PROBLEM SOVLER: Come up with a formula to determine how long of a shoelace you need and show how you figure this out.  Research the relationship between shoelace length and shoe size.  Show your work in a graph or drawing or algebraic formula.  What are some of the variables?  Do the eyelets matter?  Do the way you lace up your shoes matter?  Part B:  Design a new way to lace up your shoes.

SONG WRITER:  Come up with a new story for the 12 Days of Christmas using all new items and characters.  You can write it, sing it, dance it act it out or story board it.  One Ipad beeping, Two Xbox dinging, Three puppies yelping....

CARTOONIST:  Write a cartoon where you are the hero and save the world.  This is where writers learn to story board and this can carry on to all kinds of creating.  Make us your own super power.  Design a costume, a hide out, or a side kick. Draw it, make it, create it in another way like acting it out and filming it.  Some ideas: I am the Super Hero Fuzzworth and my super power is I can freeze time and move around fixing bad things right before they happen by moving victims out of the way.  My disguise is an old lady because no one ever suspects them. The people I help only have a fuzzy recollection of what happened, hence my alias.

BE A CHEF:  Make up your own recipe for a salad, sandwich or any meal, using nothing but left overs.  Record your work and interview who ever eats it.

BE A REPORTER:  Interview someone about what they got for Christmas.  Try to ask investigative questions like: Did they like it?  What did they really want?  Then try and recreate the event to layer your news story using friends for actors.

BE A CONCEPTUAL CREATOR OF GAMING:  Write a conceptual idea for a computer game.  Story board it or show it in a way that is meaningful to your creativity.

DESIGNER:  Make a marble run out of items in the house such as cardboard, tissue boxes, paper towel rolls BUT HERE IS THE SECRET SAUCE:  Make the marble or ball go slowly down the structure.

TEACHER:  Make you own tutorial of something you can make or do well and share it.  Teach it to your parents.  *** Example: How to survive the 1st night on Minecraft.

BLOGGER:  Make a Blog or Vlog about something you are interested in.  Even if you cant film it your can do this in the mirror.

ARCHITECT:  Make the highest structure possible out of marshmallows and dry spaghetti. Ask questions,  What made it stronger?  What shapes did you make your building blocks out off.  What worked?  What didn't word

PLAY WRITER: Create a play, design the set, make costumes perform it for family and friends.

INSTRUMENT MAKER:   Make your own musical instrument. 

COMPOSER:  Compose a song and perform it.  Ask your family to sing it with you.   See if you can do harmonies to your own melody

LINGUIST:  Create a new language out of symbols or pictures.  Teach it to someone.

SCREENWRITER:  Write or conceptualize a new episode of your favorite show and show it to someone. See if you can rewrite it with a different ending.

SUPER NINJA:  Make an your own America Ninja Course out of snow or soft items in your environment and run it and time yourself.  *******Don't do anything dangerous.

THEME PARK DESIGNER:   Make a roller coaster on Minecraft using only the natural landscape.  Don't use blocks to build but only mountains and digging down is okay.  You can use tracks.

MATHEMATICAL GENIUS:  Create a new model of the Multiplication Table using cartoon drawings.  Look at this chart below for ideas.


Thursday, June 25, 2015

Summer Learning

In the summertime when Arizona weather is so hot we stay inside. We take mini vacations, work on projects, take care of animals and the garden and focus on the joy of learning. It isn't so much a lesson plan or recipe book of activities we use as we just following our families life's interest.
We began June with a short trip to Colorado. a 14 hour trip by car from our home to my old home in the northwest corner of that state. The journey takes us through the desert biomes of Arizona's Sonoran Desert on to Monument Valley in the Navajo Nation, to the Utah Canyon Lands and up into the western high Rockies mountain biomes.  We drive it in one day and it is an adventure. Here are some photos .

The Navajo Nation is a wide open desert with these iconic southwestern images of rocks that rise like cathedrals out of the flat desert landscape. We talk about how wind and sand form this place and how they people have lived and adopted to life here in Monument Valley. Last summer we drove over a different route of reservation area coming down from Cortez, CO in to Farmington, New Mexico and down to what is left of Route 66. This gave my son more scope to the width and diversity of this large area of these reservations in the Four Corner Area.
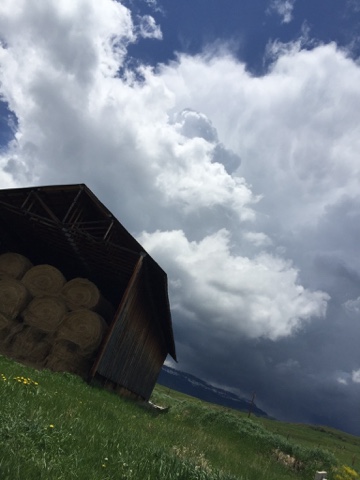
We got to our friend's house who lives at about 8000 feet above sea level on a beautiful ranch in the high mountains. Here is a hay barn where a Mamma fox had her pups or kits.  We tried to get photos of them but we were too loud and they ran away.  Still what a great place to raise a littler of babies. There were many different kinds of rodents too. Whistle pigs that look a bit like ground hogs had tunnels all over the ground and smaller ground squirrels and mice. The high passes surrounding us still had deep snow on them so summer was just beginning and the world was ten million different shades of green.
There were two Bulls in this pasture. They have been turn out with all the young females.  This is called rutting season. The bulls can be unpredictable and we left them alone.  In the morning the females would come up to the house and stand in the morning shade of the trees that surround the house that were planted so long ago by a rancher in the 1800's.  They are the only shade for them and they enjoy the mornings long shadows of the trees into their field. They wander away at around 10:00 AM.  Sometimes they moo at us as if to ask for oats or a treat but they have a whole valley of green to eat.
Here is a picture of the big trees planted so long ago. They are Cottonwood trees.

We also learned about sustainability housing by visiting an old friend of mind who has been designing, building and creating his own green home. Our friend Lock used straw bales and steel frame structure, facing south and using convection heating methods in the lower floor. It is a massive structure and the hay bales were not hobbed over yet but even as it is, he lived in it this year and it is coming right along.  Lock also designed a wonderful spiral staircase with a supporting sixteen sided pillar out of wood with no nails. It wasn't done yet as it had no hand rail.  We were all very impressed with our friend's ideas and work.  Conor loves Lock's designing skills.
Conor was very impressed that Lock had two TV's over his bed. These two creative builders has much in common.  Lock gave us a tour and we were off to see more.

We only had a week with friends in Colorado and it was back to Arizona. This was the sun's rays coming up over the ranch house.
We drove all the way back in one day.  I don't know why I do that?
Since we have been working on learning about astrobiology and using the ASU MARS ED NASA Curriculum I have blogged about in the past, we have been thinking about creating a colony on Mars and building a model.  Conor and his friend Ben have been using a geology map, I have from a Mars Ed ASU teacher's conference, as a mat surface to build sub stations and green houses.  They have created vehicles for Mars mission.  Also robotic helpers and a mining operation all out of Legos and Zometools.  They also made a polar sub-station to collect water and refining the atmospheric methane and oxygen with H20 to make jet fuel for the ride home.  We have talked about all kinds of possibilities of living on Mars.  I collected resources and made a Pinterest Board called Mars Ed HERE .   One of my friend's son has also joined us on our mission making his own station for colony to sleep in and eat.  His bunker substation can be found on the Pinterest Mars Ed page.
I was speaking about our porject with our Educator/Mentor Michael Bender, who is with SelfDesign Global (you can find out about that HERE) and he suggested using that group's Minecraft Server to create a Mars Colony out of a desert Biome.  I shared my Pinterest Board with him and his wife, Lori who lead a Self Designer group of Minecrafters and Michael has created a red sand and sandstone biome and the students have now created a building code. So big things are happening with learners in this group on the server.  Conor has survived a few days and nights on Minecraft Mars.   He made a first shelter, planted a garden, started tunneling and found an abandoned mine and water. His group decided on glass domed habitats and air locking doors.  Minecraft survival biomes, like our Mars are teaming with the un dead after dark.  There are Zombies and skeletons spawing in the mine. Who knew about all this undead life on Mars?  We have a rocketship around the portal so there is the idea of what you bring with you and what you can use while there and how much would it cost to go back to EARTH for a bucket of water in real life?  I'll keep updating on this project.  My son is aslo wanting to create MC biome models of the moons of Io, Europa and Titan too.  You can see the Pinterest resources board for that HERE.
Here is a little Zombie looking in at us from the outside of the glassed in habitat.


Sunday, May 3, 2015

Dream Catchers and Learning Through Crafting

This is another example of how to use a manipulative and the building of one to teach a lesson in geometry.  Making dream catchers and origami teaches us order and sequencing.  We learn patience and discipline.  We learn how to correct our mistakes, go back and fix things.  Beyond learning to how to self correct we learn about making and the effort involved in seeing a project created by our hands.  Beside the obvious lesson of building a project and gaining mastery of skills using our eyes and hands, we learn precision and discipline are valuable tools to us in completing projects.
 Steps matter, order matters, doing a thing right matters and also mistakes can lead to beautiful things too.
Dream Catchers are easy and simple to make. Any polygon will do but circles are the traditional shape. The hoop and  circle shape is an archetype and this had meaning to the first people, the native people, the creators of he dream catcher.  You can make your own ring out of a willow branch or some bendable object of your choosing.  You can choose to cover the hoop or ring with yarn or leather strips, sinew or string or nothing.   I am using a embroidery hoop that is larger to show  in this tutorial but you can use key chain rings or heart shaped objects and any polygon.  Any shape that connects to it's self.  I have used old bracelets and earring hoops. It can be fun to search in your home for the ring or hoop so be creative. This is one made out an old bracelet.

I like to tell the stories and share the history of the Dream Catcher's.  The internet is filled with variations to the lore.  I also recommend looking at spider webs before and after this process and pointing out to learners the sacred geometry in nature and how these designs in geometry are the building blocks and keys to so much around us.  This is a great sight for the lore on Dream Catchers. HERE


Need List
Hoop
Any choice of string, yarn, embroidery thread, leather, sinew or cording.
Scissors
Hot glue gun (Optional)
beads, feather's objects, notions /fetishes to tie on to streamers at the end as embellishments.

 STEP 1  Covering Hoops (Optional)
* Covering the hoop does make the geometrical design part less slippery on a metal ring as the yarn will have something to stick too.   With willow branch hoops and sinew string this slipping isn't an issue.  For little ones, I suggest pre-doing the willow branches or pre-wrapping the hoops as this is time consuming and boring for the little ones who attention span is limited.


To cover the hoop:
Begin with a knot on the hoop or ring.  You can use a drop of hot glue to anchor this first knot down and hold your work down to get started but it is optional.  Now go round and round tightly scrunching up the work till you cover the whole hoop.  Tie it down leaving a few inches of string to tie into loop to hang finished work later.  Keep going with this part, it does look nice even if it is boring.


STEP 2  Starting the Web Pattern


Choosing a different color string than the hoop color start off with tying the web thread off on the hoop.  Depending on your string material you may uses a needle here to do smaller dream catchers, you will be going around clock wise making looped crossing under and over the ring and then loops of thread. Resist the urge to pull tightly on your work as this will make it harder to find the next loop to work off.  You go around and round make a under over loop on the lowest loop to the right.  

No knots just progression to the next lowest loop on your right.  After a few rows around the circle you will see the shape (hopefully) of you web taking place.  Mistakes can be undone or not.  Beads can be added between loops for a pretty effect. How many times you looping your 1st row on the hoop
will determine your dream catcher's design.  What do Five points connected make.  What do 6 points make.  How far you keep looping around and around depends on the creator.  I like a big hole in the middle and then with another color begin again inside with a different count. Depending on the original size of the hoop you could do this many times.  A dream catcher inside a dream catcher, inside a dream catcher.  Play around with materials too.  Yarn, rope, fiber optic thread or LED thread?

Imagine - Play - Create - Experiment - Share - Reflect - Repeat

STEP 3 The Embellishments


The last part if the hanging of your beads and feathers.  String on shells and beads, use feathers or tie crystals and rocks on to the thread use glue gun to hold string to feathers and weigh them down so they hang right.  Look for beads with larger bored holes as you have to string them onto your thread or fit them through a needle.  You can get creative here.

STEP 4
Tie of Embellishment and make a loop with a string to the ends of the tied off string.  Hang you dream catcher up over your bed or napping place.  Little dream catchers can be worn as jewelry or attached to key chains or book marks as decorations.  We also use them to decorate Christmas trees and tie them as part of the bow or decoration on gifts.


Tuesday, April 28, 2015

The Third Installment in Changing Math Mindset-Geometry in Design

I wanted to touch upon geometry and how I have changed my fear of this subject by allowing myself to play and have fun with creating and building using the foundations of geometry.
I have been a fan of origami since I was a youngster but never really thought of its application to geometry until the last few years. There are a ton of books and on-line resources for origami creations.  One of the activities I like is the origami tetrahedron and cube shapes that you blow up. These can be hard for little children but older kids like to do those activities and like the flexegons manipulative there is conceptual and spatial intelligence involved with making these shapes. I do suggest using a large square of paper for beginners as some of the Japanese origami paper I have bought is too small to make a cube that can easily be blown up.
Another activity to show with squares of paper is fraction reductions and the Fibonacci Sequence Model. 

This photo is a diagram of fractions made into a spiral by taking a pieces of different colored origami papers and cutting them in 1/2's reducing down and layering them by gluing them down in a spiral.  It shows the spatial connection of fractions to whole numbers and the concept of how numbers form patterns and how these relationships in forms build the world around us.  I used Mortenson Math blocks or tiles to make the model of the Fibonacci Sequence below.  It could also be done with papers cut to scale too. Grid paper or graph paper is excellent to use by coloring blocks to show the concept.

Here is another manipulative. I bought this Waldorf Puzzle off of Etsy. I have taken it out of its original form and spread it out to show how forms can be manipulated and be bent but still keep their meaning. We talk a lot about the string theory and time relative to space concepts in our home. How do we bend space to travel and how will that effect time. This idea appeals to my son as he loves Dr. Who and the idea of space and time travel.  This puzzle if pulled into a three dimensional cone shape can show how space can be folded or manipulated.

 In practical life context, our community has built a spring training facility, Riverside Park for the Chicago Cubs.  We the people got a public playground too and this structure in the park is a big model of hands on geometry.  Here again we are able to see the sacred geometrical shapes in building. We can see and discuss how the triangle shape is more stable in building because we can experience that strength by climbing on the structure where it is supported by the square shapes and the triangular shapes. We can feel a equilateral triangle and a isosceles triangle and see it's relationship to other shapes as building blocks. We can see the connections these archetypical forms become other shapes and how they connect to form hexagons and on to the Platonic Solids.
I have blogged about this book before! Stories of geometry told by a brilliant writer and educator. This book is wonderful.
This is a Montessori math lesson in progress. We are making a model of the multiplication table and teaching it to the dog. Not really working to well as he struggles with his 7 times.  Even though this work isn't geometry it does show the patterns numbers make and explains the inner connection of patterns in numbers beyond a numerical hierarchy and you see the square roots in a fun way.

And my son's favorite manipulative the Zome Tool! Here he is with what I call a Buckey Ball but my son says is the prototype of a spherical submersible drone that can go into the methane lakes of the moon Titan ice surface and collect digital images and samples.  This idea of his came out of the ASU's Mars Ed curriculum. Zome Tools are another open ended tools and a wonderful resource for geometrical thinking and a limitless opportunity for learners to create and discover.
I love this activity weather permitting.  We do geometry in chalk on the drive way,  practicing vocabulary and learning nomenclature concepts.
Here is another tool for showing the multiplication table in a more holistic form. This a Waldorf lesson and it has it's root in Anthropology a organization I have studied but do not follow or agree with but I do love components of.  I find that many of the Waldorf math lessons do help my healing in Math mindset and I am grateful for the information.
I have been thinking about how to teach to the senses in math. How to make my learner have a personal relationship with math and numbers. I think if we can develop that synesthesia muscle in our brains where we feel math perhaps it will serve us better as we learn and enjoy math.  Synesthesia may be how we heal from our fears about math. We have to form more personal relationships between numbers.  Learn more about Synesthesia at this link below.

How would Vi Hart do this? Well I can only wonder? Here is another of her open-ended ness videos.


Thursday, April 23, 2015

Changing Our Math Mindset

I am always looking for more activities and methods with math to make learners fall in love with math and stay in love with the joy of learning.  Any tool that will pull us in and compel our curiosity is powerful.  We found the flexagons templates on DabbleBabble.com. The Hexagon-flexagons were on a sight called Auntannie.com. There are many sights for these little manipulative a printout templates and a variety of variations of shapes. There are also many You Tube tutorials on flexagons. One of my personal favorites is the Vi Hart channel on You Tube.


Vi Hart has charming tutorials on math topics and her short videos are filled with thrilling math concepts, her lessons are fun and sensorally compelling. All of these resources make math fun and joy in learning changes a negative mindset.  I look at it as cultivating the math mind so little seeds will grow.  Vi Hart has a plethora of Happy Math Mindset mathematical ideas and her video montages are a fine resource for any digital library.

Here is our video tutorial of the manipulative  We made. https://m.youtube.com/watch?v=ISyI-MVfyQ8

Wednesday, April 22, 2015

Geometry and Joyful Math Mindset Shift

I struggled with math most of my life.  From upper elementary school on I hated it.  As an adult and educator I wanted to find a way to love math again and heal the wound where my first image of
"My Inner Self" was damaged by the experience of I was not good enough to do math.  How to do this, heal my inner self and change my negative self-talk, has become a huge priority as I work with my own son.
One of the ways, I have found is finding joy again in Math. Learning the relationships of patterns and numbers and exploring spatial forms and geometry as it relates to the world around me has helped me shift my mindset.  Here is one of the activities I have used to engage learners and create a joyful experience. This lesson is taken from a Waldorf educational lesson. 

The supplies needed for this activity are:
Semi-transparent folding squares 6"by 6" (these are a waxy transparent origami paper purchased off Amazon)
Glue Stick
Scissors or paper cutter
I start on a hard surface and tell the story of how being precise matters and taking my time matters in math and measurement.  Origami design teaches quickly by trial and error how getting the fold wrong is going to effect work and it shows up in this structured spatial geometrical lesson. Getting the fold wrong and auto correcting is important so I tell my students the importance of making mistakes and how getting it wrong teaches us more because we must learn from our mistake and correct our problems. You have to be resilient as a problem solvers.  We must not give up but keep at it till be get it right.  To be able to keep going and having the determination too after failure is just as important as getting the answer right and often the process of learning all that: think, make, fail, reflect, redo, is more valuable to our long term goals.  It is all part of the process of learning.

So for the design here we followed the patterns of the color wheel and used half of a sheet folding the edges to meet in a long rectangle and then doing the corners down twice in both directions. I glue all the folds down as I go. My son helps me do this. Sometimes we cut the origami paper in fourths and make various folds to create more patterns.  (I'll add now that my son hates this work and these shapes are really about healing my math ego, his is in pretty good working order.)  There are many ways to do these little geometrical shapes and no way is wrong.  They are very pretty and cheerful on the windows too.
I used the middle line on each diamond shape to match up to the next paper diamond. Again patterning these shapes can revel all kinds of "Aha Moments".  This is a great lesson for symmetry and can as open ended as you like.
Finished product in window. You can see the circle shapes that form and how the precision in the folds effect the over all design.